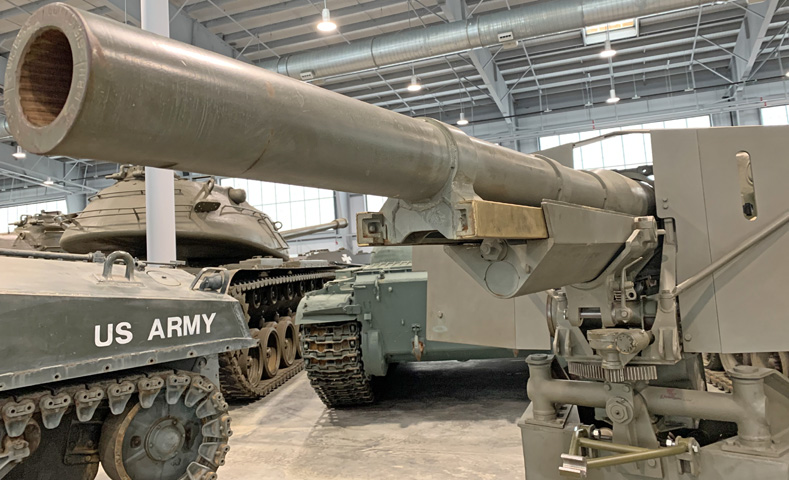
75mm Gun Motor Carriage M3.
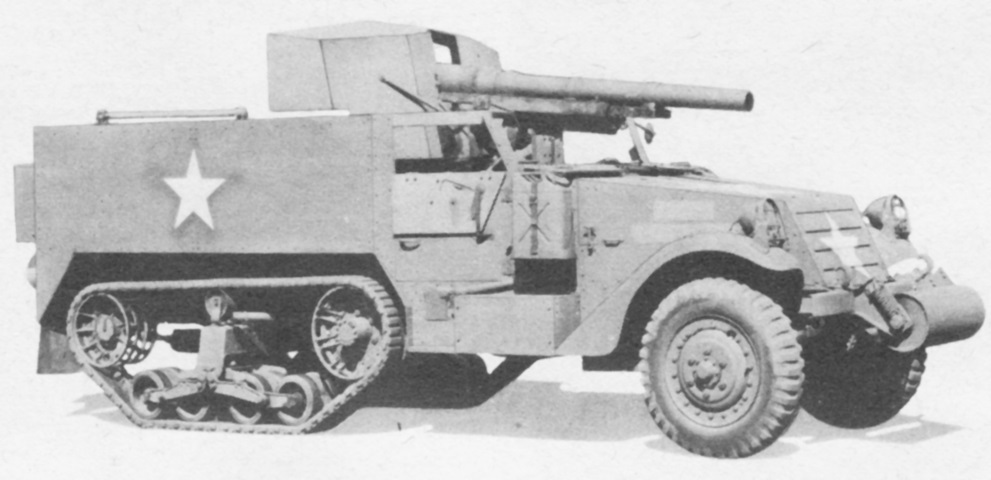
A broad view of the 75mm GMC M3 is shown here. The upper windshield support beam is absent, and the armored windshield cover folds down onto the vehicle's hood. This half-track has the double-coil idler wheel and fender-mounted headlights. (Picture from TM 9-710 Basic Half-Track Vehicles (White, Autocar, and Diamond T).)
This rear view shows the stowage boxes mounted to the rear of the half-track. A pioneer tool rack is also mounted below the driver's door. (Picture from TM 9-710 Basic Half-Track Vehicles (White, Autocar, and Diamond T).)
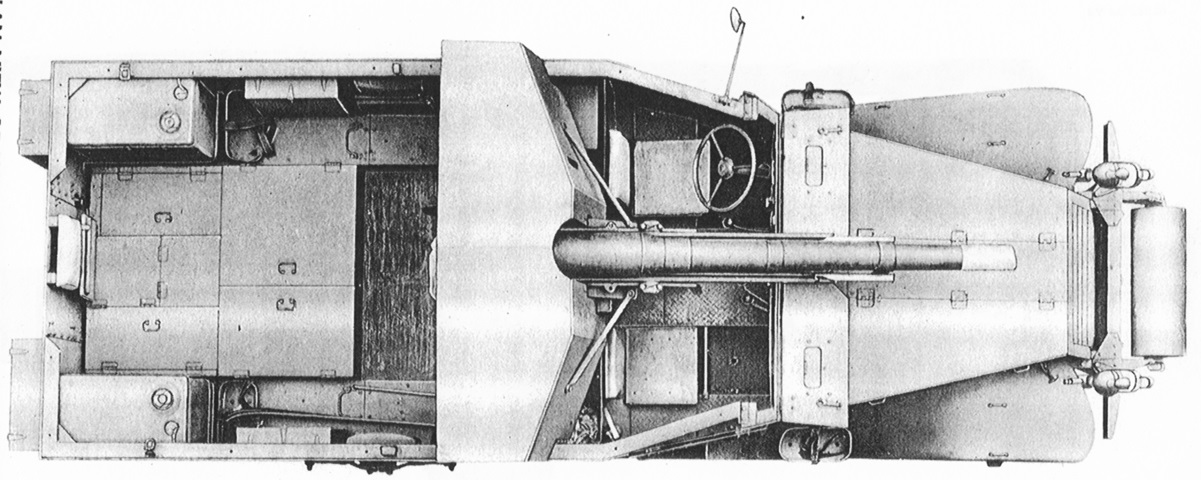
The location of the gun mount in the passenger compartment can be seen here. (Picture from Standard Nomenclature List G-102.)
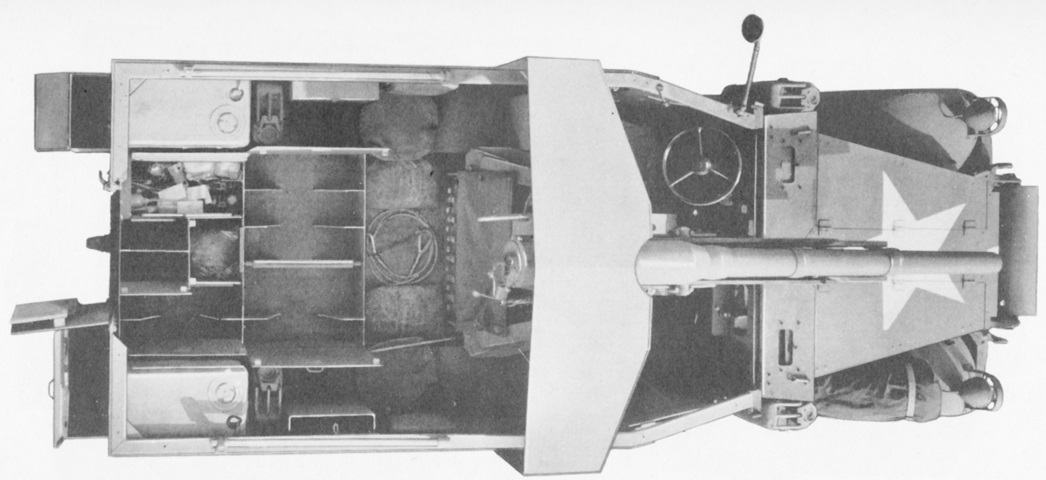
The stowage compartments and boxes are open in this picture. (Picture from TM 9-710 Basic Half-Track Vehicles (White, Autocar, and Diamond T).)
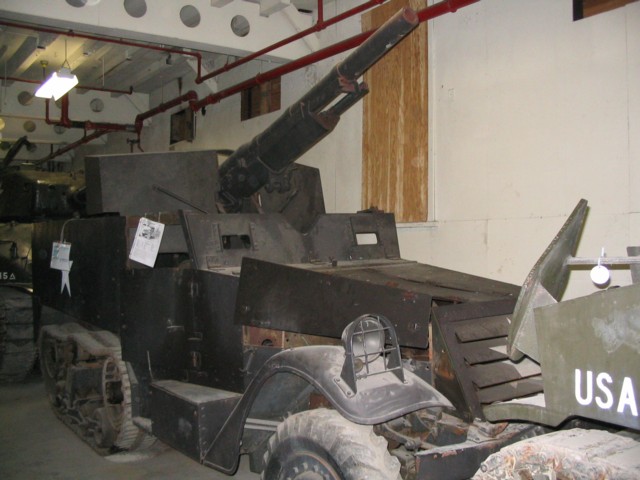
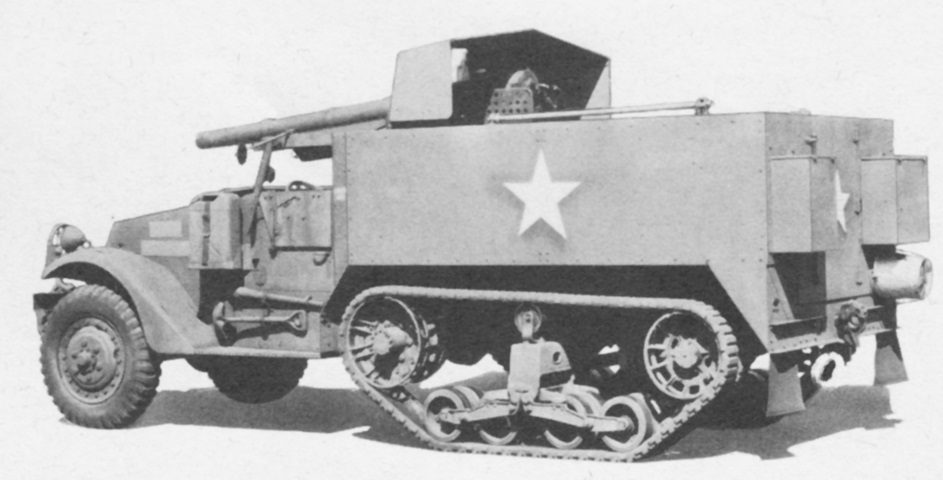
The notch in the armored windshield is evident in this M3 GMC. This vehicle is fitted with the large fender-mounted headlights, but muzzle blast from the large weapons mounted on American half-tracks forced manufacturers to switch to a set of smaller, demountable headlights. The hood on this half-track is slightly ajar, and its suspension is sagging with age.
On this trainer for the gun mount M3, the dovetailed gun slide can be seen. The slide was composed of steel rails covered with bronze strips which served as the bearing surface. Four supports secured the gun to the slide. The triangular tubular support of the travel lock is folded forward; it engaged with the horizontal cylinder under the gun slide.
Some ammunition is stowed in the base of this mount. The aperture for the aiming telescope is visible on the left of the gun, but the telescope itself is absent.
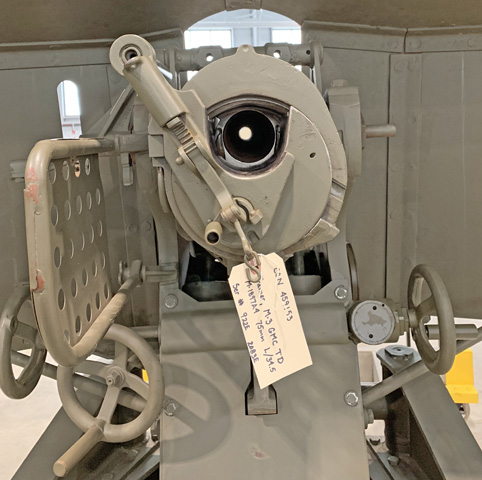
From this angle, the shoulder guard on the left side of the gun can be seen.
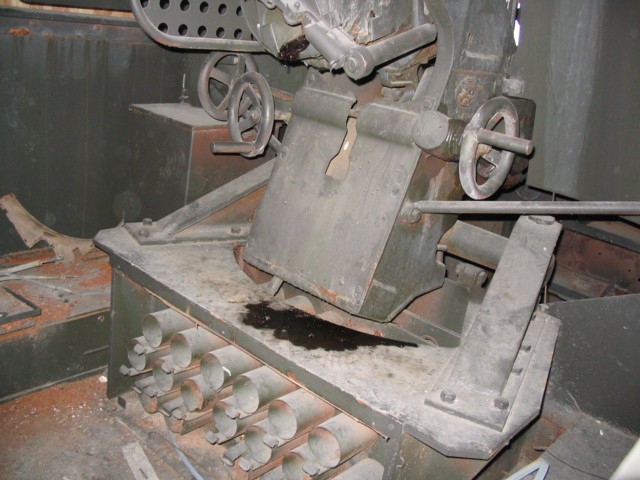
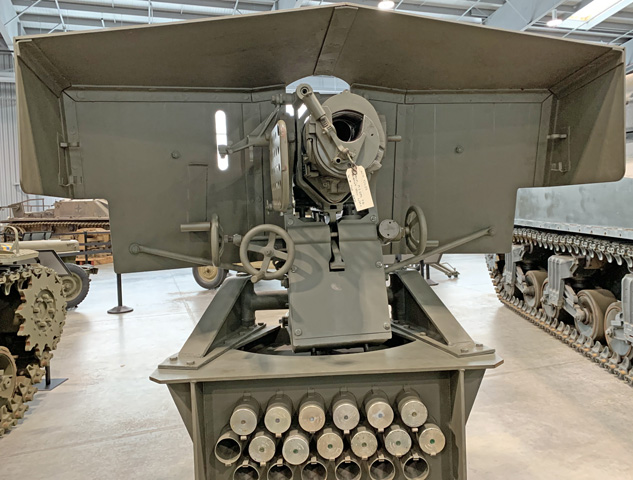
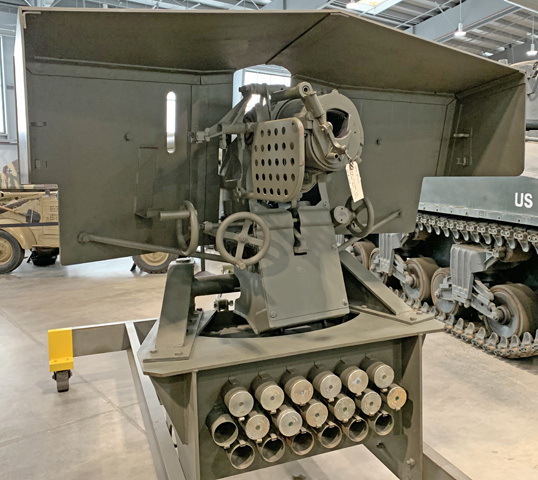
The rear of the gun mount M3 is shown here, including stowage for nineteen 75mm rounds below the gun. There is an elevation handwheel on each side of the mount, and the traversing handwheel is facing to the rear on the left side of the mount.
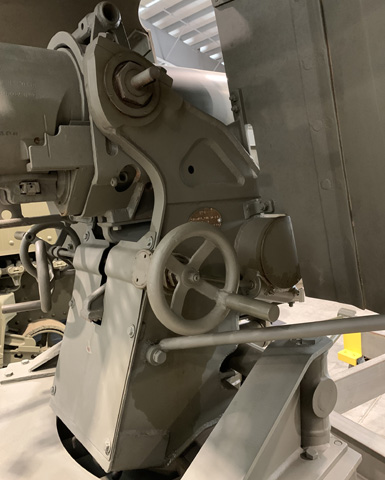
The right-side elevation handwheel is at the center of this picture, while the other two handwheels are on the opposite side. A complete rotation of the elevation handwheel yielded a 10-mil change in elevation. A support for the gun shield is attached to the mount under the handwheel.
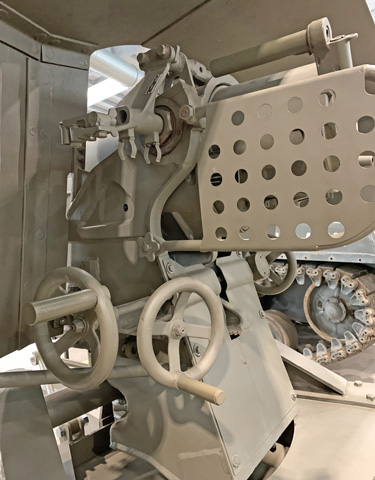
The other two handwheels were in close proximity, and the gunner's shoulder guard can be better seen in this image. One rotation of the traverse handwheel produced 19 mils of traverse.

This front view of the gun mount shows the traversing pinion meshing with the traversing rack to the front, and the elevating arc can be seen above the traversing gears, under the gun barrel.

The traverse and elevation gearing are seen from the opposite side. A closer view of the travel lock support is provided as well.
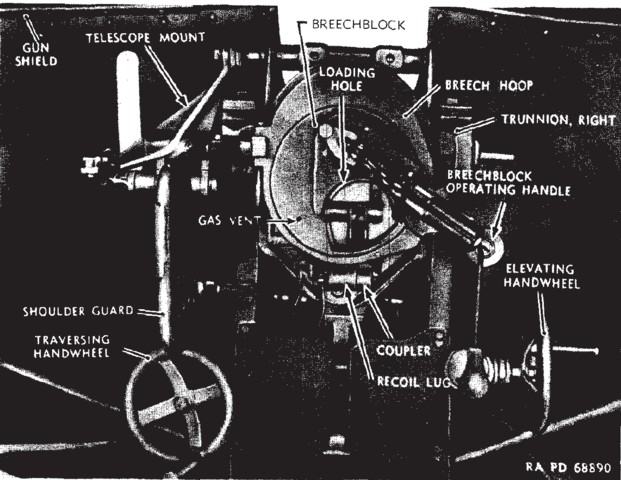
The breech on this gun is rotated to the open position. The breechblock was of the Nordenfeld eccentric screw type, and after loading was rotated to the right by 156° to the closed position. Stops prevented further rotation in either direction. The loading hole did not close when the breechblock was rotated or when the gun was fired; it was simply no longer aligned with the chamber when the breechblock was rotated to the right. When closed, the firing pin in the breechblock became aligned with the primer of the loaded round, and the breechblock automatically locked until the gun was fired or the breechblock was manually unlocked.
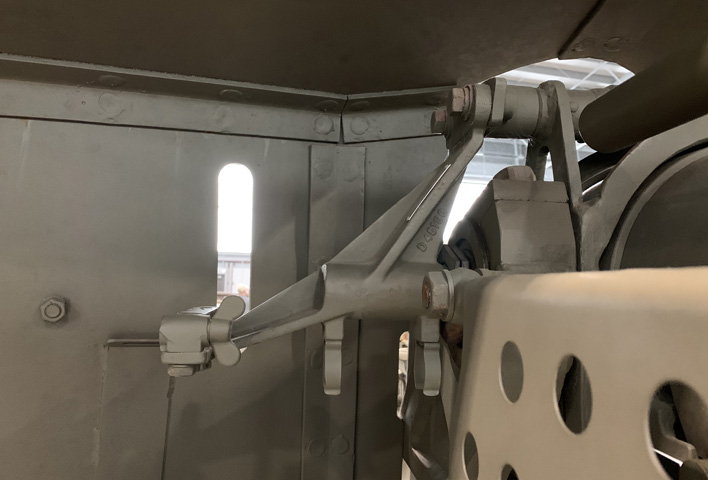
The mount M36 for the sight M33 is seen here with the sight absent. The mount was fixed to the gun tube and provided with no leveling bubbles.
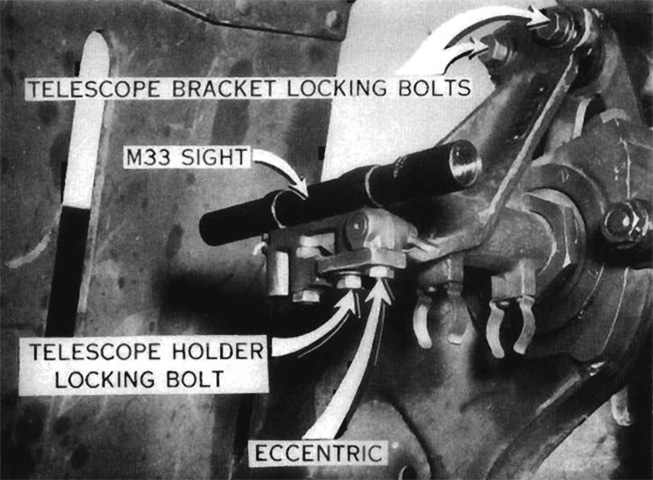
The sight M33 is shown here secured in the mount M36. The sight provided no magnification. (Picture from TDS 105-11 Tank Destroyer Weapons, Chapter 11 75-mm Gun, M1897A4 on Motor Carriage, M3A1.)
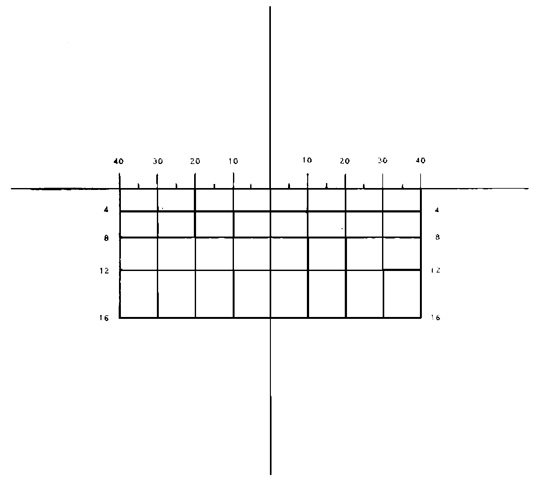
In the telescope's gridded reticle, the horizontal lines established elevation for ranges of the numbers indicated in hundreds of yards based on the shell mark I with a muzzle velocity of 1,768 feet/sec (539m/s). The vertical lines established angles from the bore axis of the number of mils indicated. (Picture from TDS 105-11 Tank Destroyer Weapons, Chapter 11 75-mm Gun, M1897A4 on Motor Carriage, M3A1.)
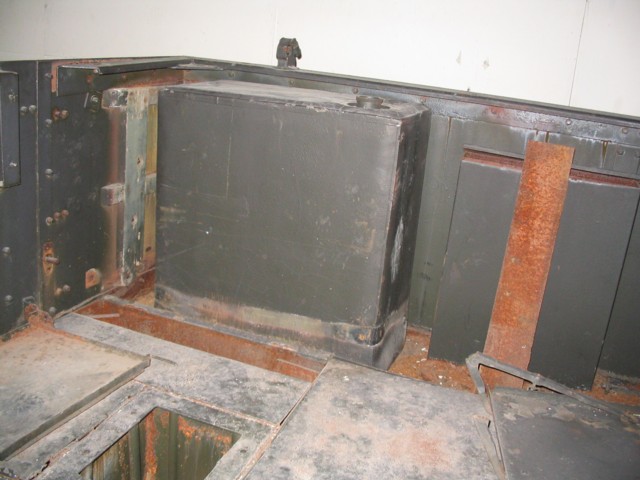
The fuel tanks in the 75mm GMC M3 were relocated from the normal position behind the drivers to the rear corners of the passenger compartment. The subfloor for stowage is visible in this picture as well.
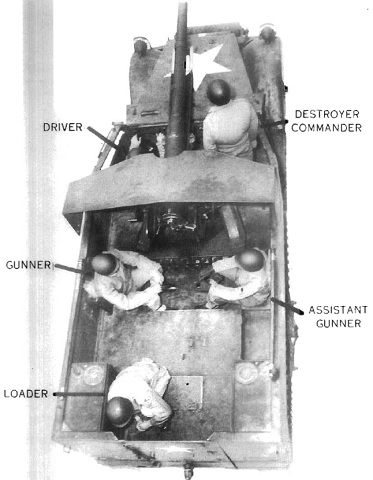
The crew is at their posts in this image. To reach their posts, the driver enters through the left cab door, the commander mounts over the armor shield from the right front, the gunner mounts over the left side, the assistant gunner mounts over the right side, and the loader mounts over the rear door. (Picture from TDS 105-11 Tank Destroyer Weapons, Chapter 11 75-mm Gun, M1897A4 on Motor Carriage, M3A1.)
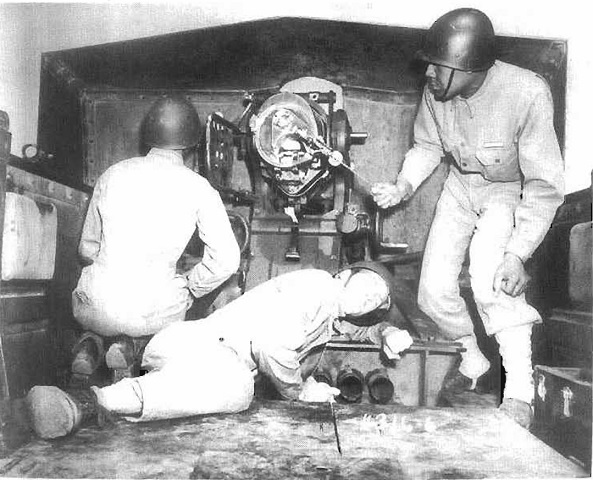
After loading, the loader was to duck down into the well under the gun and say, "Clear" when away from the recoil path. At the gunner's command, the assistant gunner is the one who actually fires the ordnance via the lanyard. (Picture from TDS 105-11 Tank Destroyer Weapons, Chapter 11 75-mm Gun, M1897A4 on Motor Carriage, M3A1.)
The gun mount M5 found on the 75mm GMC M3A1, which utilized the older gun carriage M2A2, only had one elevation handwheel instead of the two found on the gun mount M3. (Picture from TM 9-306 75-mm Gun M1897A4 Mounted in Combat Vehicles.)